


Your garage door starts down, hesitates, then pops right back up. Or the opener lights blink and the door refuses to close unless you hold the wall button. If you are trying to figure out how to align garage sensors, that behavior is usually the first clue that the safety eyes are out of line, blocked, or loosely mounted.
These small sensors sit near the bottom of the door tracks, and they do one job that matters a lot. They create an invisible beam across the opening. If that beam is interrupted, the opener will not let the door close normally. That protects kids, pets, vehicles, and anyone passing through. It also means a slight bump from a trash can, broom, bike tire, or even vibration over time can leave you with a garage door that acts stubborn for no obvious reason.
How to align garage sensors without making it worse
The good news is that sensor alignment is often a simple fix. The bad news is that people sometimes start loosening hardware, bending brackets, or adjusting the wrong parts and turn a five-minute problem into a service call. The goal is not to force anything. It is to make both sensors face each other cleanly and steadily so the beam can connect.
Before you touch anything, look for the most basic issue first. Dirt, spider webs, leaves, and moisture can block or scatter the beam. Wipe both sensor lenses gently with a soft cloth. If one lens is muddy or cloudy, that alone may be the problem.
Next, check whether anything is physically in the way. Yard tools, stored boxes, sports gear, and even a low-hanging extension cord can interfere. The sensors need a clear straight path from one side of the opening to the other.
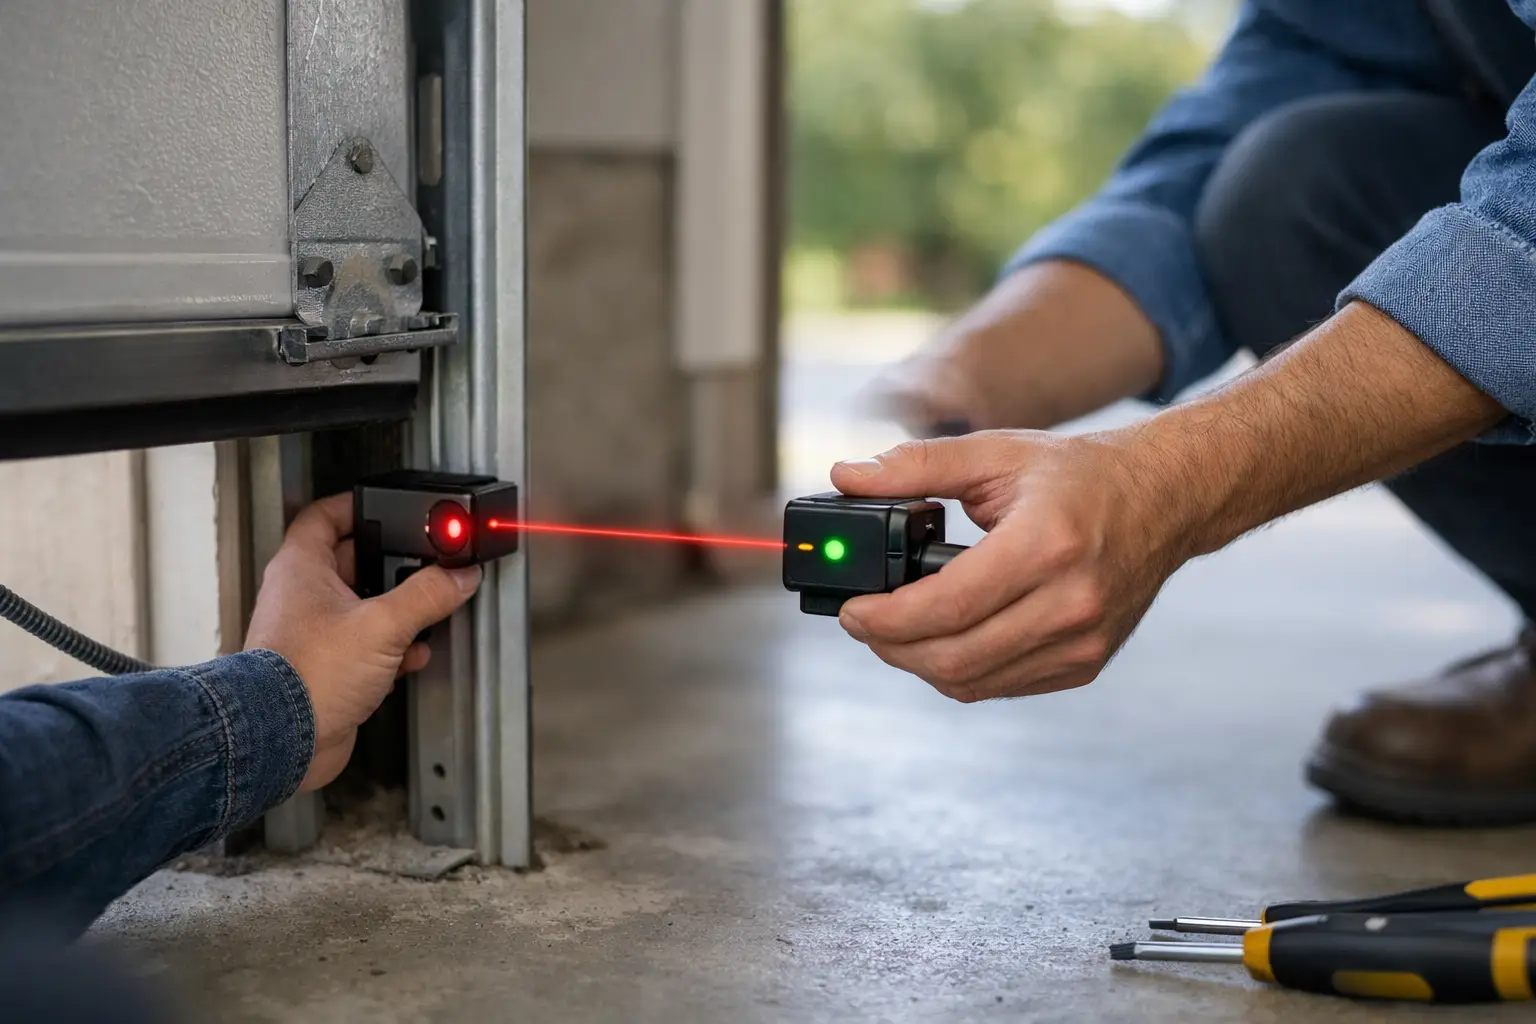
If the path is clear, check the indicator lights on the sensors. Most systems have a light on each sensor. One is often steady when it has power, while the other changes when alignment is correct. The exact color and behavior depend on brand, so you may see amber, green, or red. What matters most is whether one light is off entirely or one flickers when it should be steady.
Start with the sensor that looks loose
In many cases, one sensor has simply shifted. Look at both brackets from the front and side. If one sensor is tilted up, down, or off to one side, that is usually your culprit. Loosen the wing nut or mounting screw just enough to move the sensor. Do not remove the hardware unless you have to.
Now slowly turn the sensor until the indicator light becomes steady. This part is easier if one person adjusts while another watches the light or tests the door. Once the light looks solid, tighten the hardware carefully. Too much pressure can twist the bracket again, which puts you right back where you started.
Check the bracket before blaming the sensor
Sometimes the sensor itself is fine, but the metal bracket is bent. That happens more than people realize, especially in busy garages. If the bracket has been hit, you may need to straighten it gently by hand or with light pressure. If it is badly warped, cracked, or rusted through, alignment may not hold for long. In that case, replacement makes more sense than repeated adjustment.
Use a level if the lights are not helping
If the sensor lights are hard to read, a basic level can help. Place it against the sensor housing or bracket and compare both sides. They should be mounted at roughly the same height and pointed directly at each other. This is not a precision lab setup, but if one side is noticeably lower or angled away, the beam may never connect reliably.
Common reasons garage sensors go out of alignment
If you have had to align them more than once, the real issue may not be the alignment itself. It may be why they keep shifting.
The most common cause is accidental impact. Garbage bins, lawn equipment, kids' bikes, and even a car tire rolling too close can bump the bracket. Loose mounting hardware is another frequent problem. Vibration from daily door use can slowly back off a nut over time.
In Northern Colorado, temperature swings can play a role too. Expansion and contraction do not usually throw a sensor wildly out of place, but they can expose weak brackets, old hardware, or marginal wiring. If the sensors only act up during very cold mornings or after wet weather, alignment may be part of the issue, but wiring and moisture are worth checking too.
Signs the problem is not just alignment
This is where a little caution saves time. Not every sensor problem is solved by repositioning the eyes.
If one sensor light stays completely off, the unit may not have power. That could mean a wiring issue, a bad connection, or a failed sensor. If the wires look frayed, pinched, or pulled loose from the terminal, stop there. Low-voltage sensor wiring is not as dangerous as spring or opener work, but bad connections can be frustrating to trace if you are guessing.
If the door reverses randomly even after the lights are steady, the opener may be reacting to travel limits, closing force settings, or track resistance instead of the sensors. A door that binds, jerks, or sounds strained can fool homeowners into thinking the sensors are the issue when the real problem is mechanical.
If the sensors line up but the door still only closes when you hold the wall button, that often points back to the safety circuit. It could be misalignment, but it could also be damaged wires, failing sensors, or an opener board issue.
How to test the door after aligning the sensors
Once both sensor lights are steady, test the door normally with the remote or wall button. Stand clear and watch the full closing cycle. If it closes smoothly without reversing, test the safety feature too.
Place a long object like a broom handle in the sensor path while the door is open, then try to close it. The door should refuse to close or reverse immediately. Remove the object and test again. This tells you the beam is not just aligned, but actually doing its job.
Do not use your foot, a pet, or anything fragile for this test. Keep it simple and safe.
When DIY makes sense and when it does not
If the fix is cleaning lenses, tightening a loose bracket, or making a small alignment adjustment, most homeowners can handle it. That is especially true when the sensors are easy to reach and the opener behavior clearly points to the photo eyes.
It gets less simple when the brackets are damaged, the wires are suspect, or the opener has multiple symptoms at once. The same goes for commercial overhead doors or older systems with inconsistent wiring repairs. If you are spending more than 20 to 30 minutes chasing a flickering light, there is a good chance the issue is bigger than alignment.
That is where a local garage door technician saves you time. A good tech can tell quickly whether the problem is sensor position, sensor failure, wiring, opener logic, or a door issue that is tripping the safety system. At Greeley Garage Door Repair by Mike, this is the kind of call we see all the time. What looks like a simple sensor problem sometimes is one, and sometimes it is a sign of a larger repair that should be handled before the door leaves you stuck.
A few mistakes to avoid while aligning garage sensors
One common mistake is forcing the door closed and ignoring the safety eyes. Another is bending brackets aggressively instead of making small adjustments. People also tighten the hardware before checking the light, then wonder why nothing changed.
The bigger mistake is treating the sensors like an annoyance instead of a safety device. If your garage door opener is refusing to close, it is usually trying to tell you something. Sometimes that message is as simple as clean the lens and straighten the eye. Sometimes it is telling you the system is no longer dependable.
If your sensors keep drifting out of line, if the lights never go steady, or if the door still acts up after adjustment, trust that pattern. A garage door should close consistently and safely every time. If it does not, getting it checked now is a lot easier than dealing with a door stuck open during a storm or a car trapped inside when you are already late.
A steady sensor light is nice. A garage door you can count on every day is better.